
 In recent years the notion that “musclecars can’t handle” has finally been put to bed, both in the form of modern factory-produced track monsters as well as the vintage builds that have dominated handling-focused competitions like the Optima Street Car Challenge.
While that’s certainly good news for musclecar fanatics who’re interested in more than just straight-line performance, getting a vintage chassis to handle well isn’t simply a matter of throwing a set of lowering springs and modern tires into the mix. The engineering behind suspension tuning is incredibly complex, and systems are designed to function as a sum of the parts involved rather than as a collection of arbitrary components – you can’t simply toss a few new suspension pieces into the equation, alter the factory geometry as a result, and expect improved handling from the car.
Along with just being a mechanically superior design to the outgoing half-century old tech found on the front end of Plymouth, Control Freak Suspension’s IFS kit cuts a whopping 121 pounds of unsprung weight off the front of the car. While any sort of weight savings will have a positive effect on acceleration, braking, and handling, unsprung weight provides an even greater performance benefit per pound than weight removed from areas of the car that are suspended.
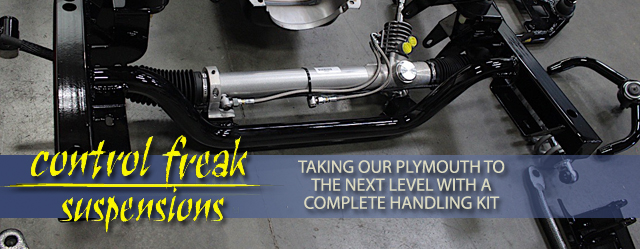
As such, making big handling improvements on old school chassis can be a painstaking process that requires a lot of research to execute correctly. Fortunately for us and Project Track Attack, our road-hugging ’65 Plymouth Belvedere, Control Freak Suspensions has taken virtually all of the guesswork out of the modernization process for the front end of vintage Mopars with their independent front suspension kits.
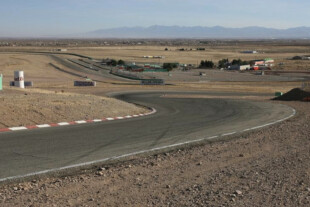
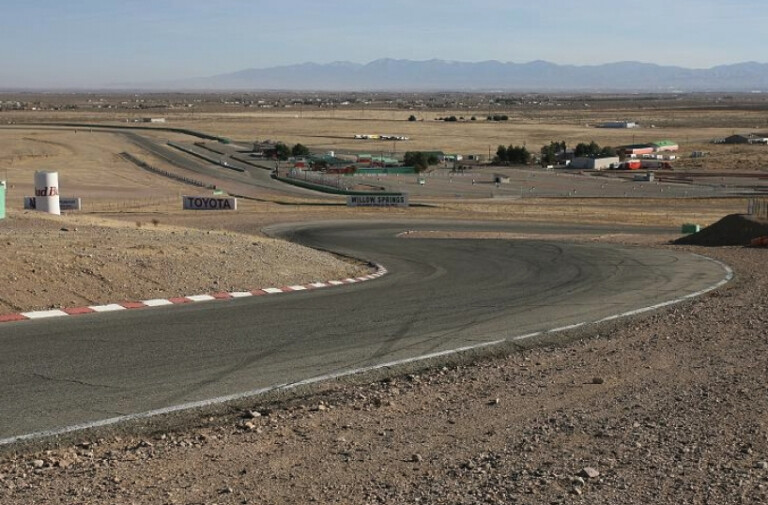
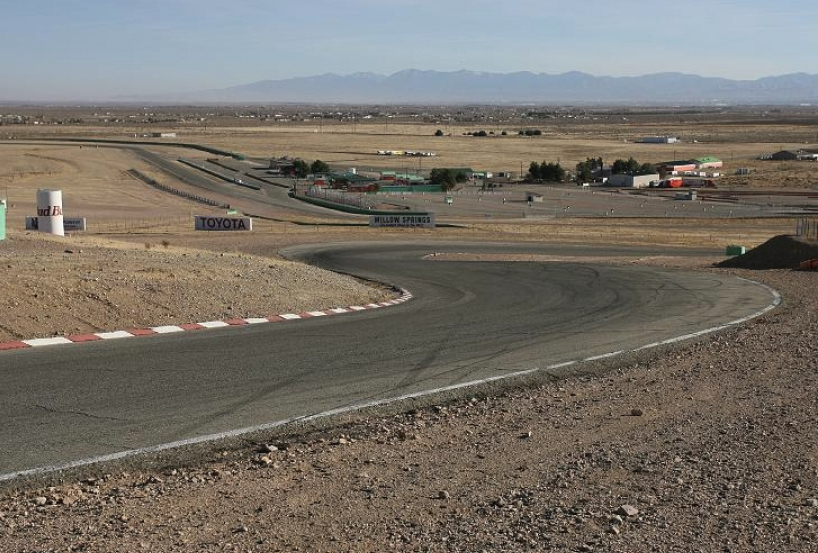
This system replaces Chrysler’s torsion bar setup with a fully independent coilover system that improves handling, braking, high speed stability, and torsional rigidity of 1962-1965 B-body Mopars, as well as 1967-1976 A, 1966-1972 B, and 1970-74 E body Mopar street machines in one fell swoop, as well as some AMC models. Here we’ll pour over the details and features of the kit, walk through the important elements of the install, and prepare the new-and-improved Plymouth for some track time at Willow Springs International Raceway.
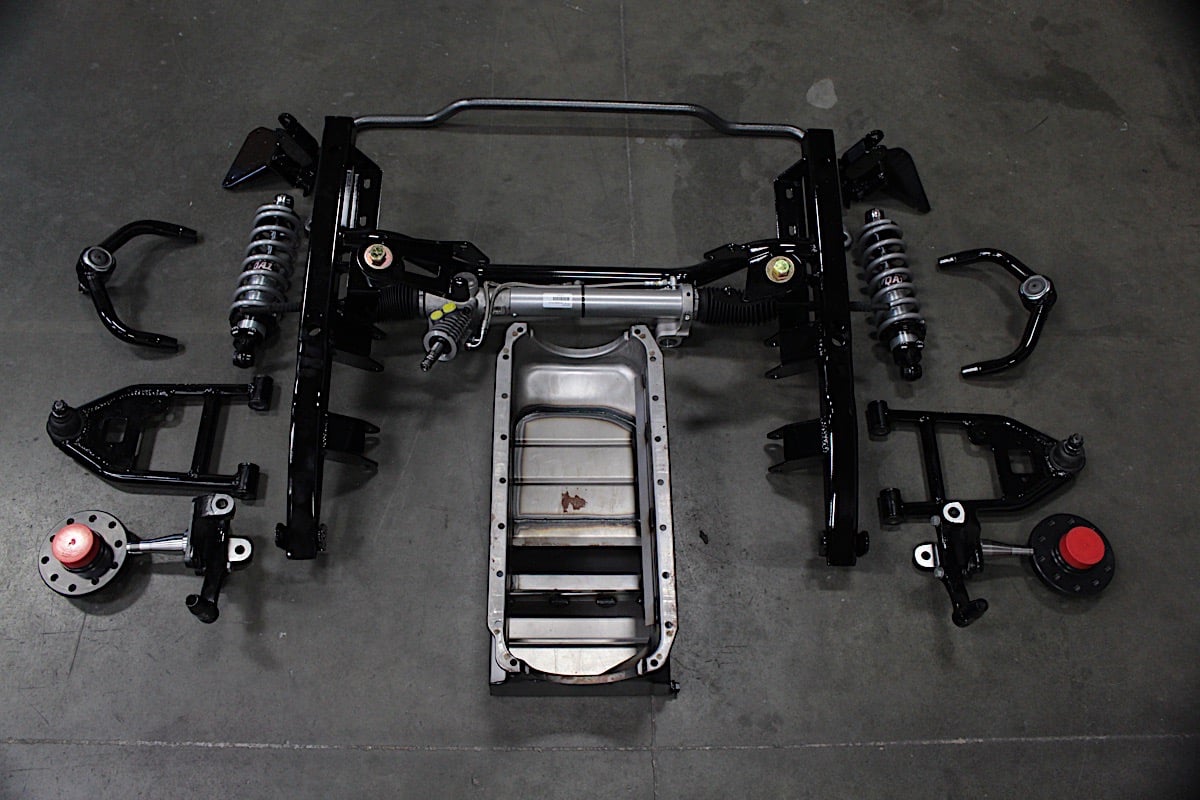
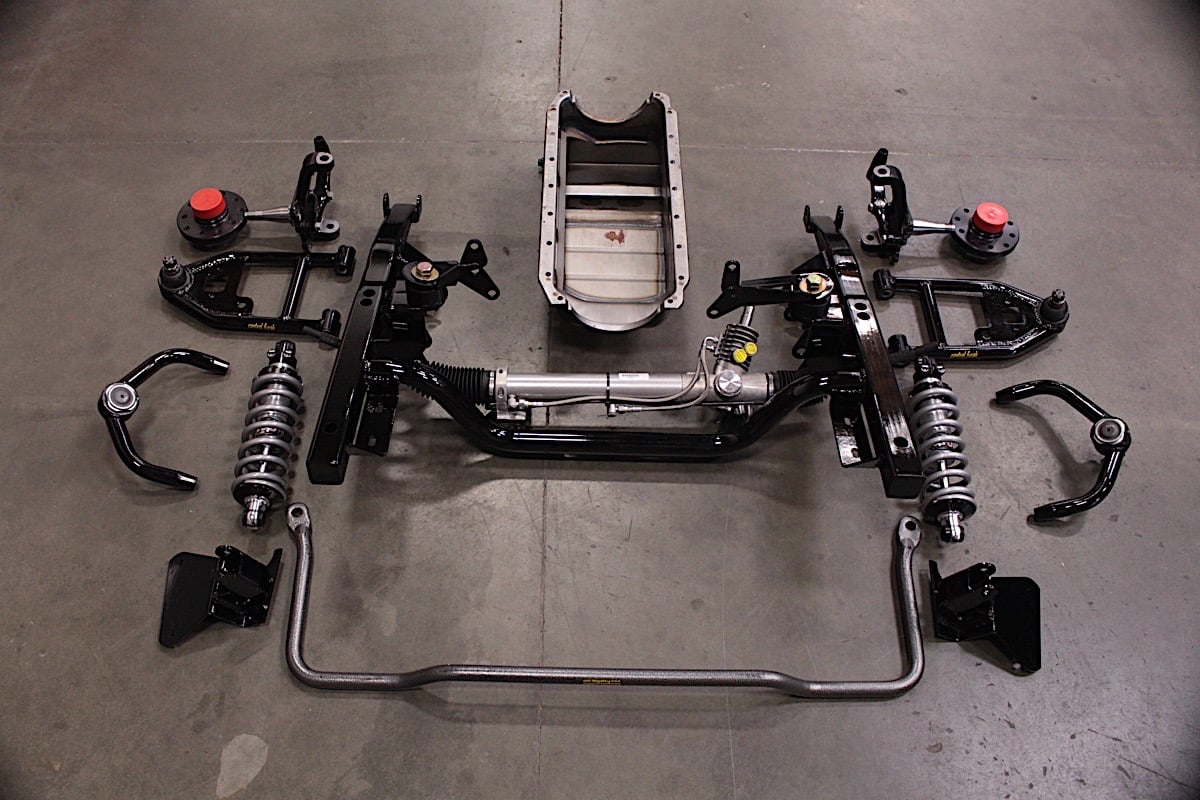
Since the Control Freak Suspensions kit utilizes a rack and pinion steering system, a rear sump oil pan may be required to clear steering and crossmember. One is included with the kit.
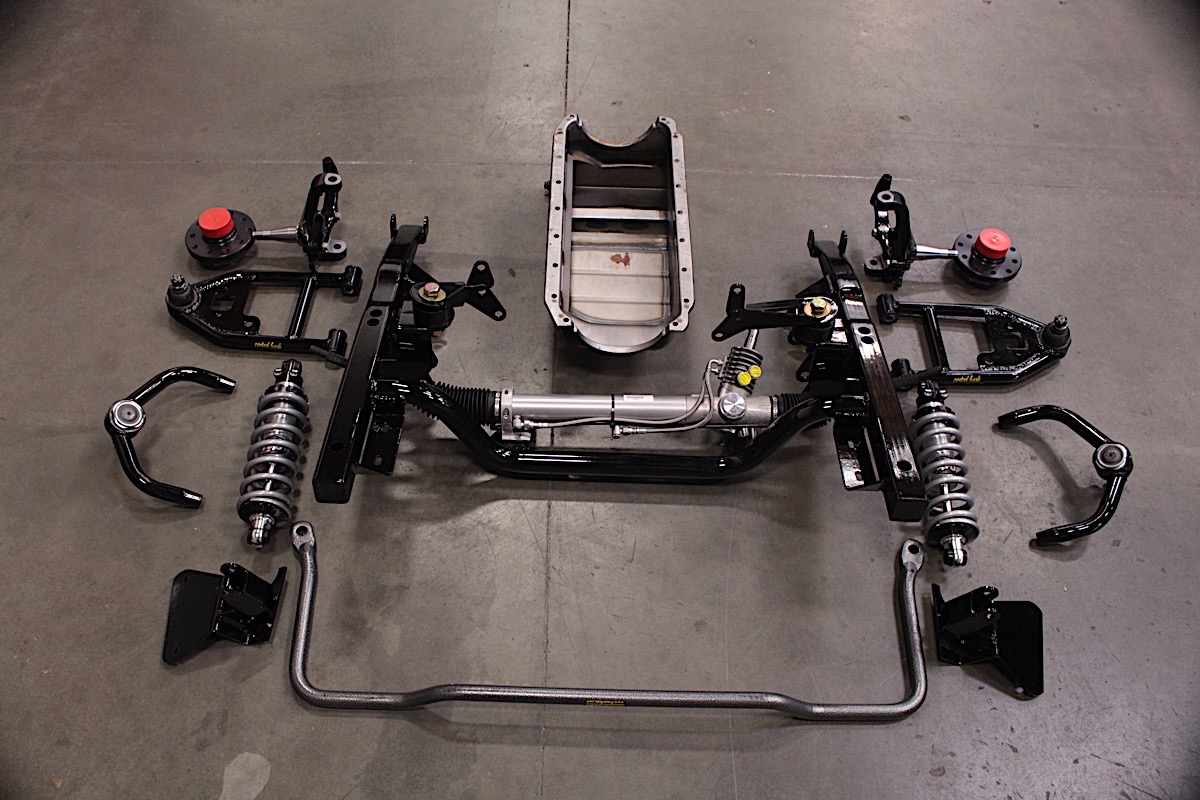
Going IFS
While torsion bar suspensions can be surprisingly capable setups when properly configured, the performance of the factory B body Plymouth components is a far cry from handling prowess that can be had from a modern coilover system, and making the switch can provide a number of side benefits as well.
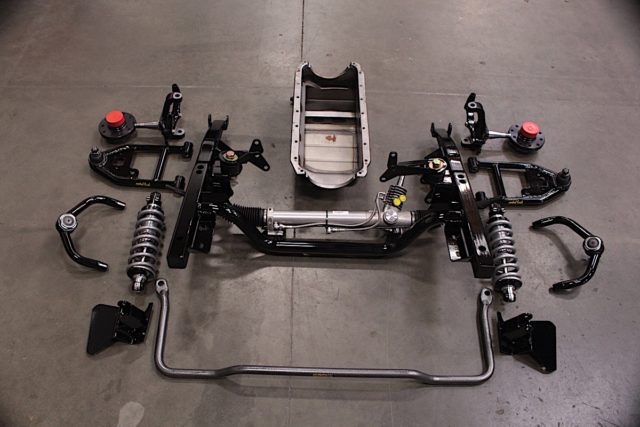
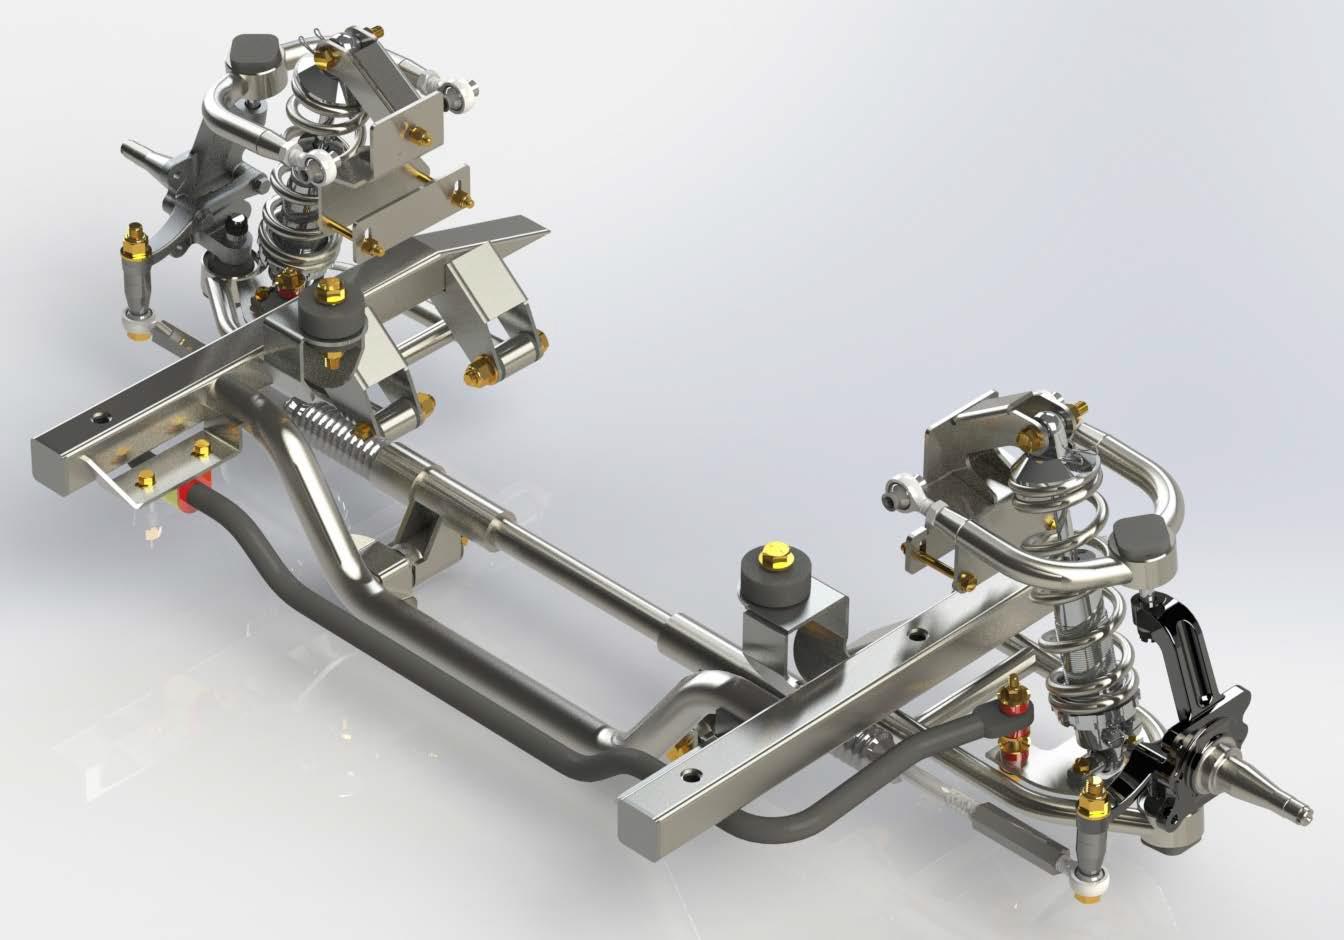
Designed in-house on the latest SolidWorks CAD systems, the system not only provides more caster, camber and ride height adjustment than is possible with the factory suspension system, it also sheds more than 120 pounds of unsprung weight from the front end of the car while also increasing header clearance by the absence of the torsion bars and the swap to the included front steer system.
Since this is a true bolt-in package, Control Freak Suspensions includes a manual Flaming River rack and pinion steering with polygraphite bushings, though since the Belvedere is a daily driver we opted to upgrade to a power-assisted unit from Flaming River to keep from breaking into a sweat every time we need to do a three point turn.
In terms of coilovers, the kit includes double adjustable units from Viking Performance. Made in the USA, these lightweight aluminum units offer 19 positions of compression & 19 positions of rebound adjustment for a total of 361 different valving combinations to choose from (along with ride height adjustability), allowing builders to fine-tune not only the stance of their car, but the ride quality and overall firmness of the system.
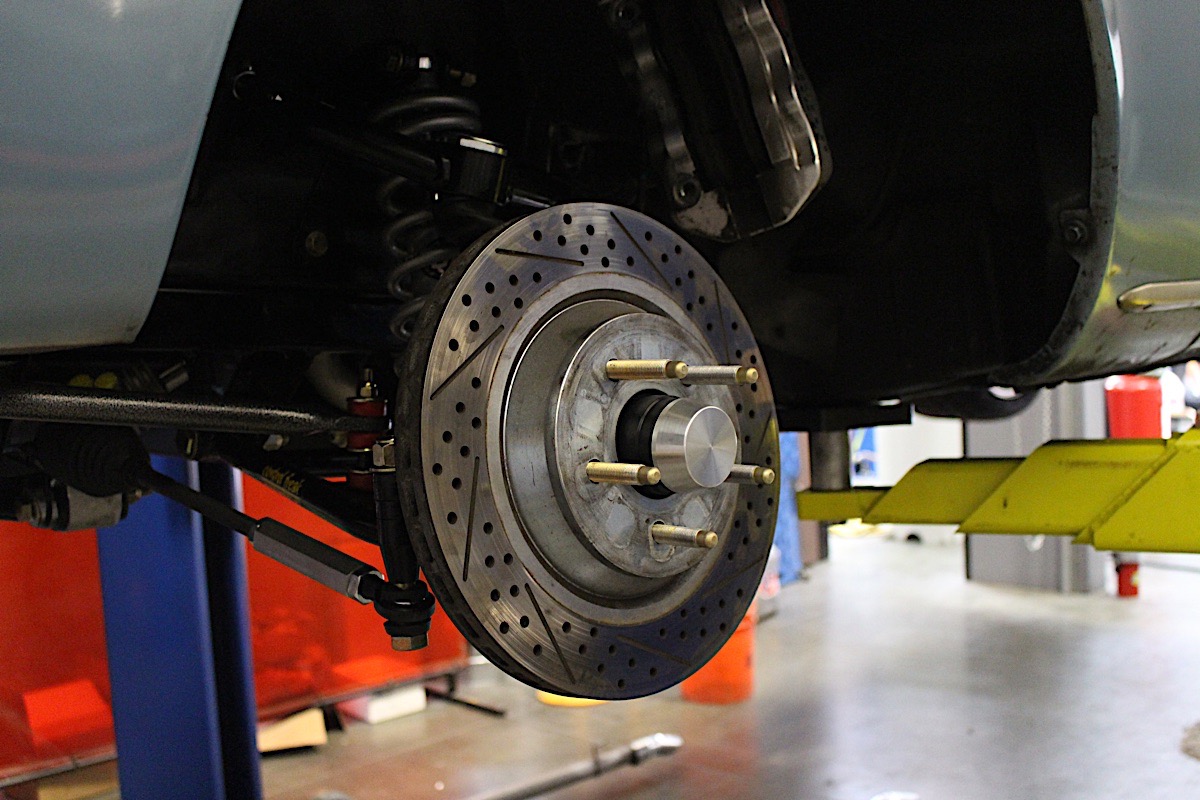
While a Wilwood brake kit is optional with the Control Freak Suspensions IFS system, we opted to use our existing MP Brakes kit with upgraded mounting brackets.
This is of particular importance to those who are planning on heading to the track often, as this adjustability allows the suspension damping to be fine-tuned for the surfaces of different road courses to really maximize the car’s potential. Viking Performance high tensile steel springs, which are matched to the specific application in terms of weight requirements/spring rate, are also included in the kit.
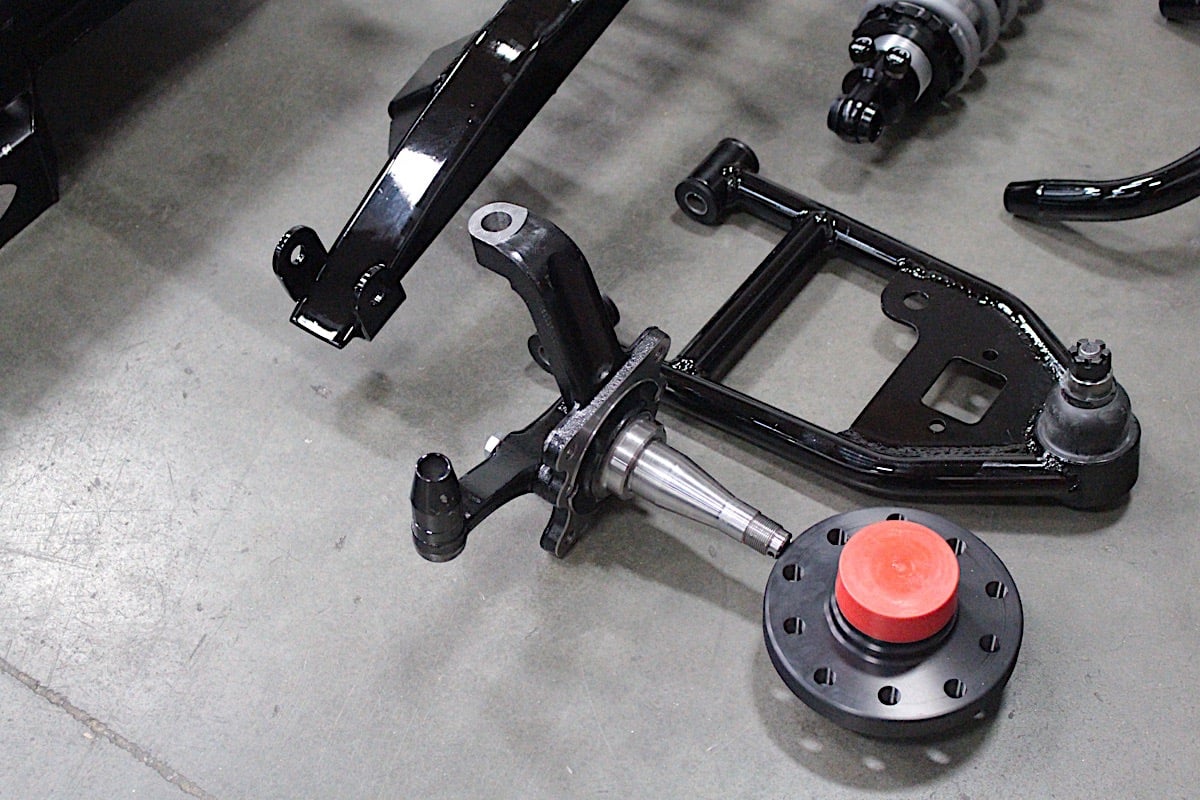
The bones of the system are comprised of an NC precision-bent, DOM seamless round tube K-member, forged Wilwood Pro Spindles with custom forged steering arms, and a stainless steel steering shaft with polished steering U-joints from Flaming River. Adjustable tubular upper control arms with machined ball joints and bushed rod ends are also part of the deal, which utilize OE-style eccentric cams and D bolts for adjustment.
The kit uses 360 degree welds and precision built-in dedicated fixtures done by certified welders, along with Grade 8 hardware from US and Canadian foundries. For Australian Mopar enthusiasts, Control Freak Suspensions also offers this kit in right-hand drive configuration.
Any way you slice it, this kit provides a comprehensive and complete solution to give a vintage Mopar’s front suspension system a complete makeover that’s designed to tackle the twisties with the best of them.
Installation
Though the installation is a pretty straight forward proposition on vehicles that have factory-straight chassis (i.e. no serious front end damage in their past), it is a somewhat involved project, so Control Freak Suspensions recommends that relative newcomers to DIY projects like these might do well to enlist the help of seasoned professional to ensure a hassle-free installation. It’s also important to note that some factory hardware such as the K-member bolts and upper control arm bolts are reused with the new suspension system, so don’t toss anything out before you’re sure it’s not going back in the car.
While this installation can be performed without removing the motor or transmission, you will need an engine bridge across the top of the motor to relieve stress and raise it slightly so the old suspension can be removed, and the use of a lift is highly recommended.


Of course to get the new suspension in, the old torsion bar system must come out. Before you start tearing the front end of your car apart, it would be wise to get the car up on a lift and visually inspect the frame rails to ensure there are no significant bends from collisions or poorly executed chassis modifications, as such damage will prevent the new K-member from going in smoothly.
Once the engine is properly braced the teardown process can begin by removing the original K-member assembly, steering box, shaft and linkage, spindles, control arms, brakes, and torsion bars, along with the factory motor mounts. We’ll just wait here patiently while you knock that out.
Done with that already? Now is the time to take a closer look at the front frame rails of the car to ensure that they don’t have any problem areas that need to be straightened out before the new system can go in. Fortunately most issues can be handled with some skillfully-performed hammer work, as tolerances to which these vehicles were manufactured often varied by as much as ¼ inch on each side, and the kit’s K-member mounting brackets are designed to accommodate slight deficiencies.
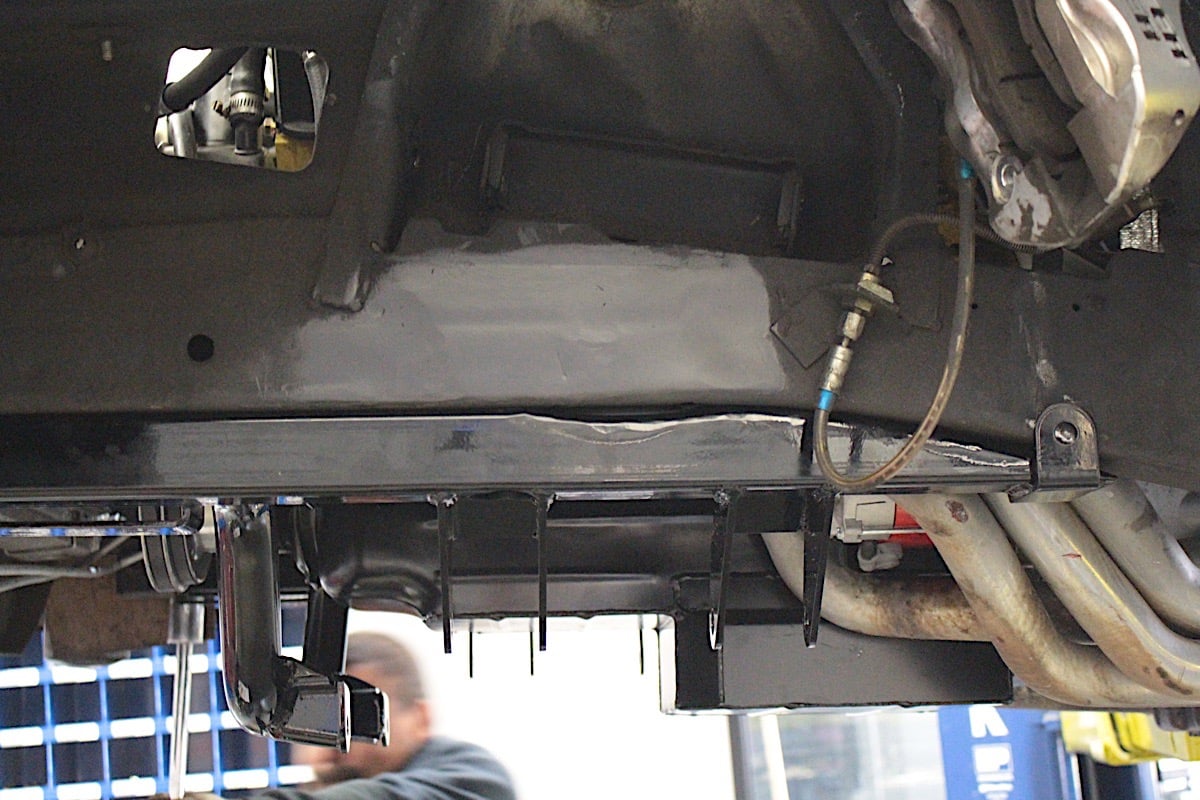

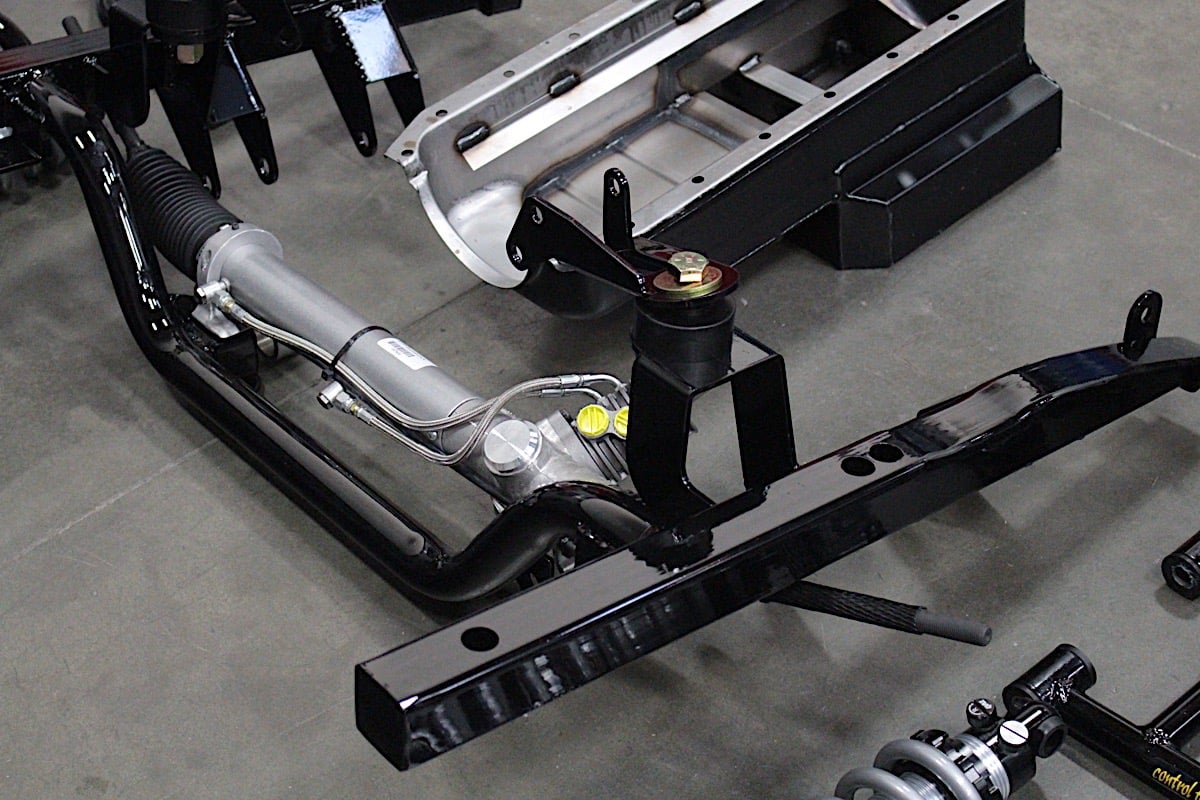
A look at the area where the upper coilover mount will attach to the chassis. Along with the attachment point in the section seen in the upper center part of the picture on the left, two additional reinforcement points will also be installed on the inside of the chassis rails using the lower attachment bracket of the upper coilover mount.
Now the new K-member can go in. Once it is in position you can hold the cage in place with a jack so that you can install the four original K-member bolts, torquing them to the specs indicated in the extensive instruction guide.
For B bodies like this Belvedere, the coilover mount is incorporated into kit via a subframe mount system that essentially self-aligns with the shape of the frame rails to position it. During the installation of the upper coilover mounts additional parts will also be installed on the inside of the chassis rails using the lower two bolts of the upper coil over mount. These longer bolts are drilled through the chassis rail.
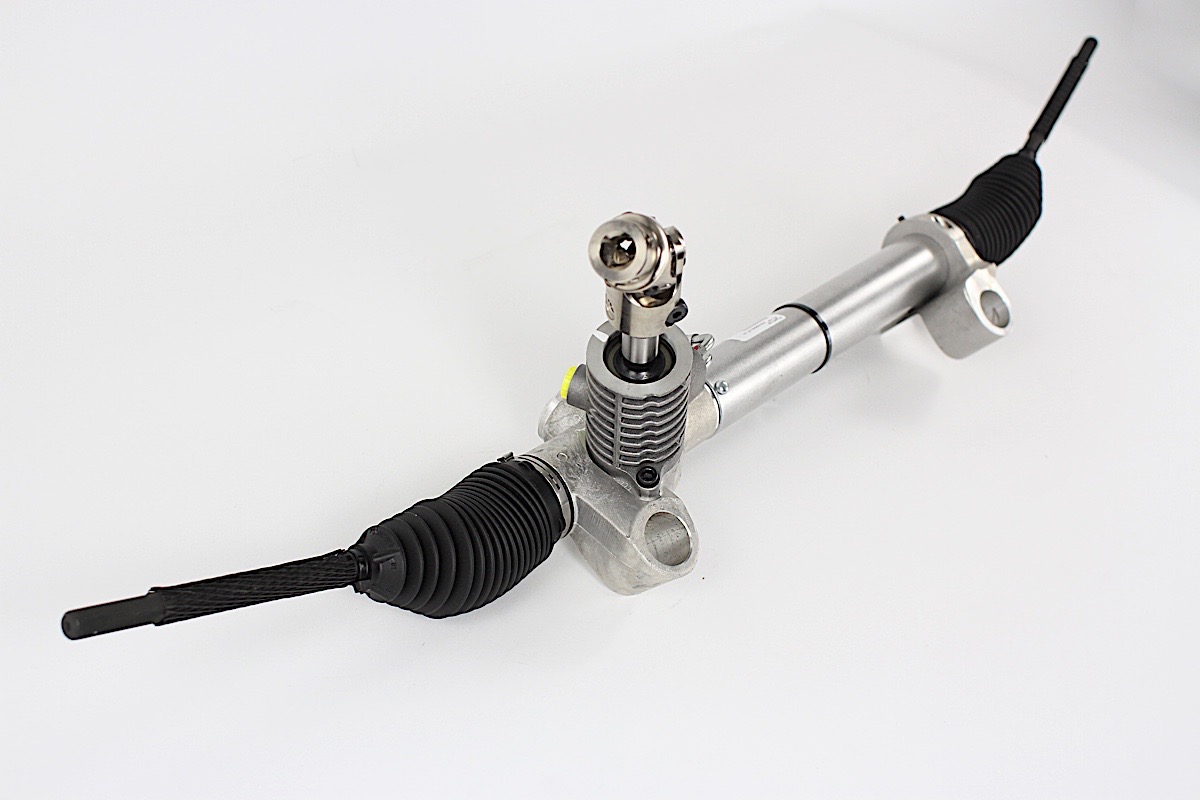
For Project Track Attack we opted for Flaming River’s Mustang II-style Power Rack with a 16-inch mounting location and a plain powder coat finish (PN. FR40001PLN). Flaming River’s rack offers over six inches of travel, which provides the full factory turning radius for vintage applications like this Belvedere.
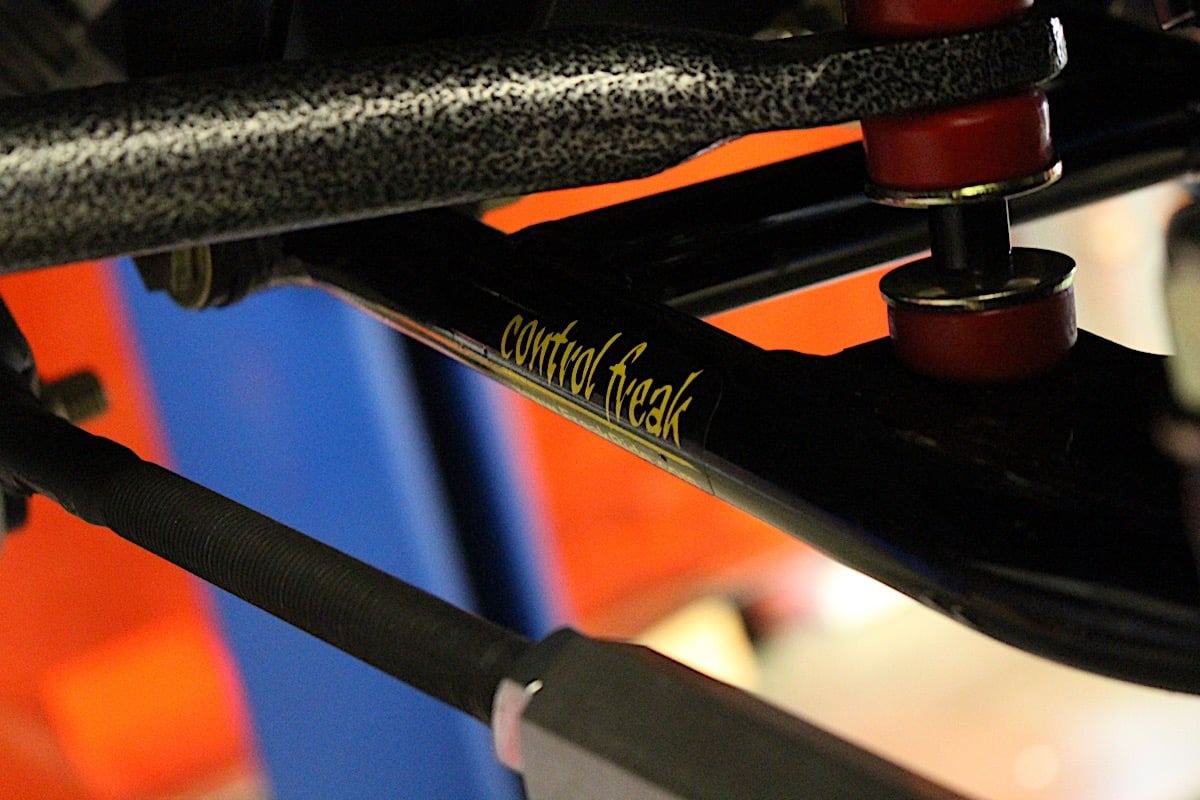
Once the coilover mounting is sorted, installation moves on to the lower and upper control arms. Lower control arm installation is pretty straightforward, and determining which one goes on which side is made obvious by the fact that the sway bar attachment will be located at the front of the arm. The bolts, washers and Nylock nuts for these are included with the kit.
Though they look similar, the left and right upper control arms are unique and are denoted by an “L” for the driver’s side and an “R” for the passenger side on the outside face of the ball joint sleeve, so be sure to check that when bolting these up. Each upper control arm is held in place with the original two cam bolts.
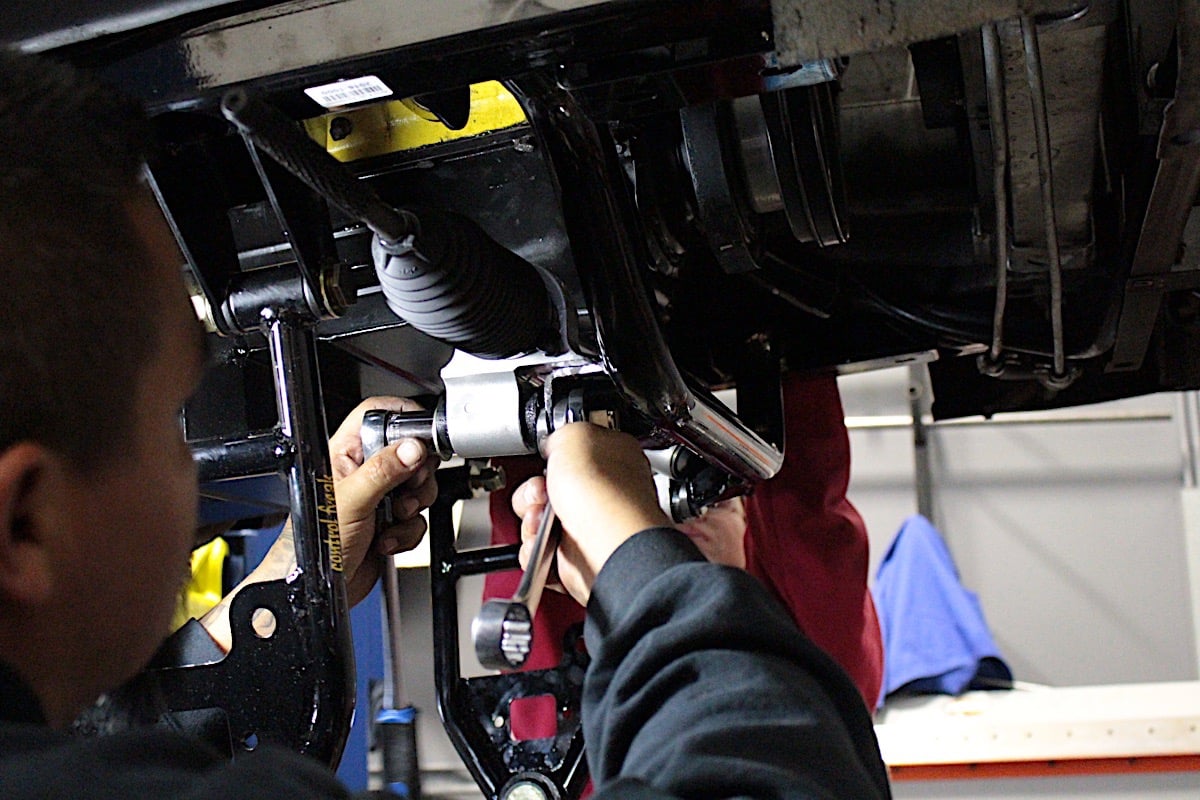
Next, the steering arm is attached to each spindle – the spindles and steering arms are bi-directional, so there is no left or right to worry about. With that completed, the coilovers are installed, along with the supplied motor mounts.
Now the steering rack goes in. Keep in mind that if you’re using a power-assisted rack like we are rather than the manual rack that’s included in the kit, you’ll be using the four supplied angle cut shims, which are placed on each side of the steering mounting bracket to provide proper alignment for the rack.
Once you get to the sway bars you know you're on the home stretch. Once the frame rail mounts and end links are hooked up, the process of putting the system together is ostensibly complete.
After installing steering tie rod adjusters onto the steering arms, we turned our attention to the steering shaft, which will need to be trimmed and have a hole drilled. Be sure to check out this installation feature for more details on the rack and pinion install as well as tips on how to properly cut shaft to size.
From here we moved on to the sway bar, installing the frame rail mount bushings (make sure they are lubricated with the supplied white Teflon grease before they go on), and hooking the sway bar end links to their respective lower control arms.
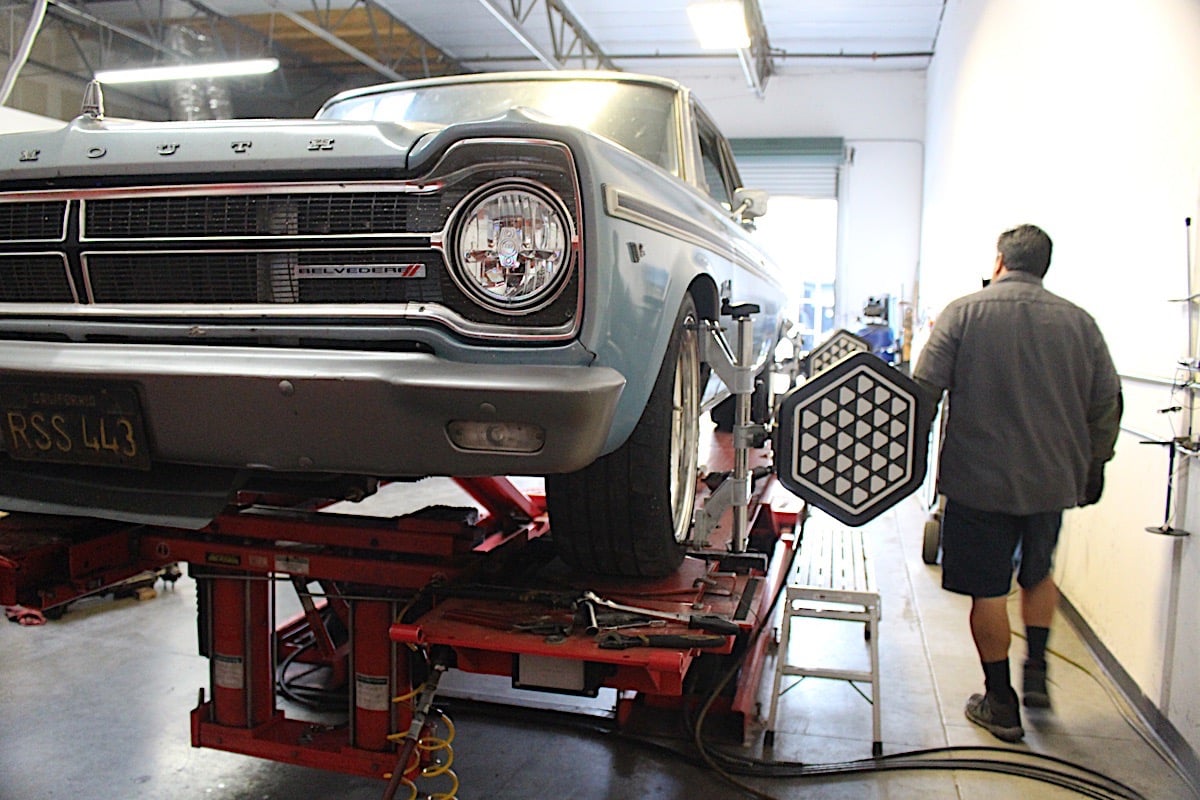
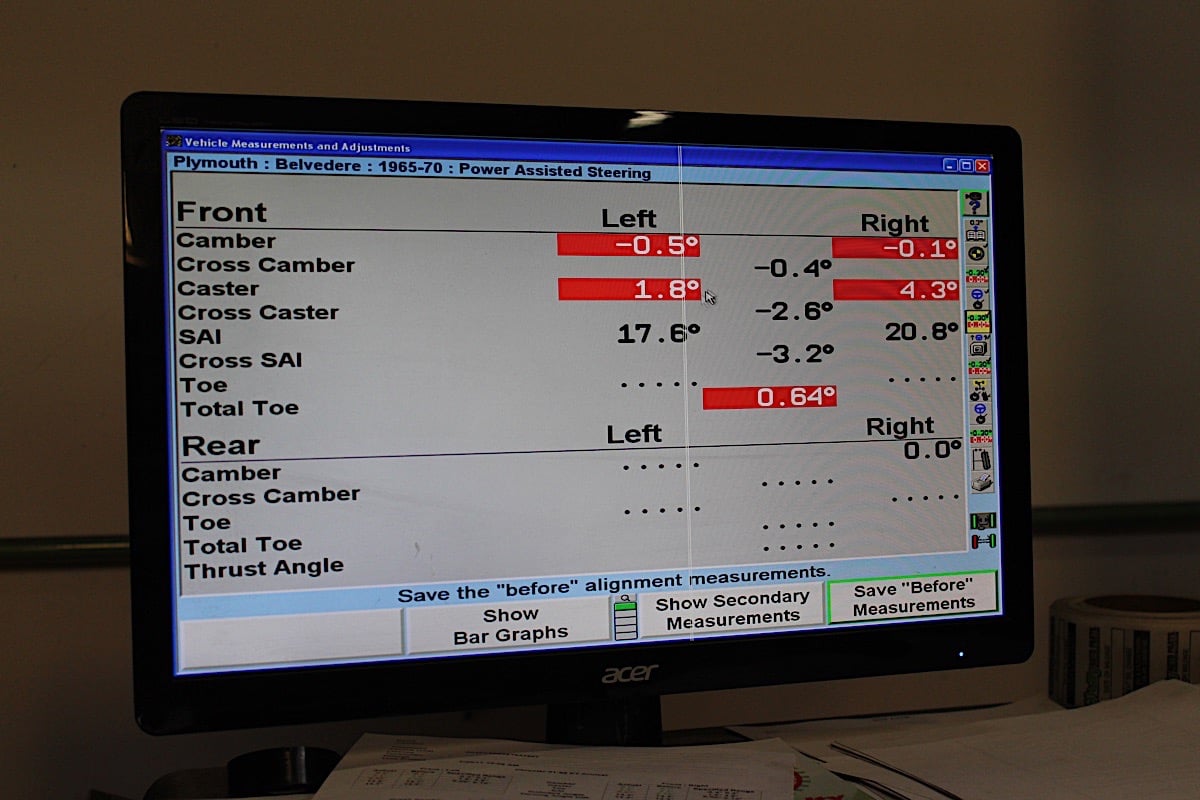
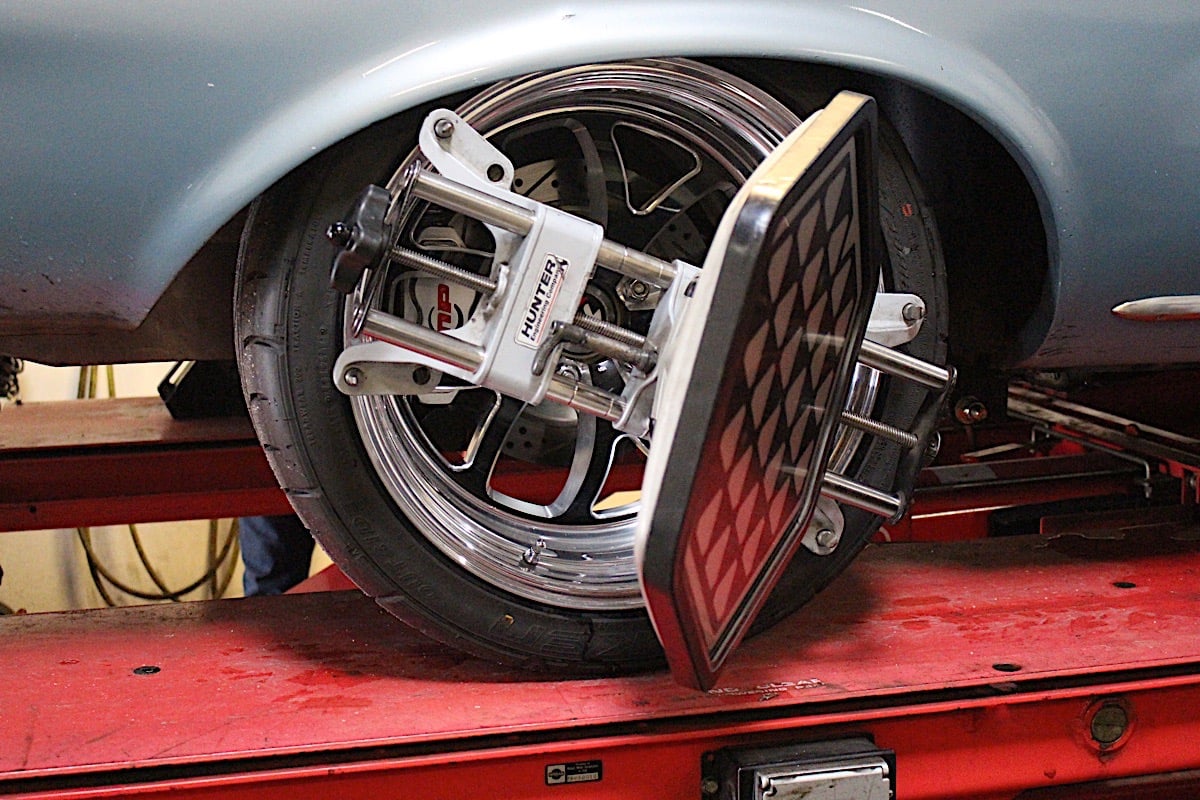
After a preliminary visual alignment is done in order to get the car from the install location to the alignment shop, an all-wheel alignment is performed to properly dial the new suspension setup in.
After ensuring that all fasteners have been tightened to spec and a visual alignment had been dialed in to get the car over to the other shop, the Project Track Attack received an all-wheel alignment to get the handling dialed in for the track time it’ll be seeing in the near future.
Driving Impressions
Having driven this car for over 15 years and taking it to the track for the past few years, we’ve been able to see the improvements in small steps with mostly bolt-on parts. We’ve also driven the car a few thousand miles all over the Southwest, and we can’t help but to hit the freeway ramps a little more aggressive than usual now with the Control Freak Suspensions kit.
The car tracks flat through the turns, and after a few minor adjustments after the coil springs have settled, it’s highly noticeable that the car simply handles whatever turn we throw it in. We have yet to take it back to Willow Springs to see if we can improve our lap times even more, but our plan is to get it out there again and provide a full report on our results.
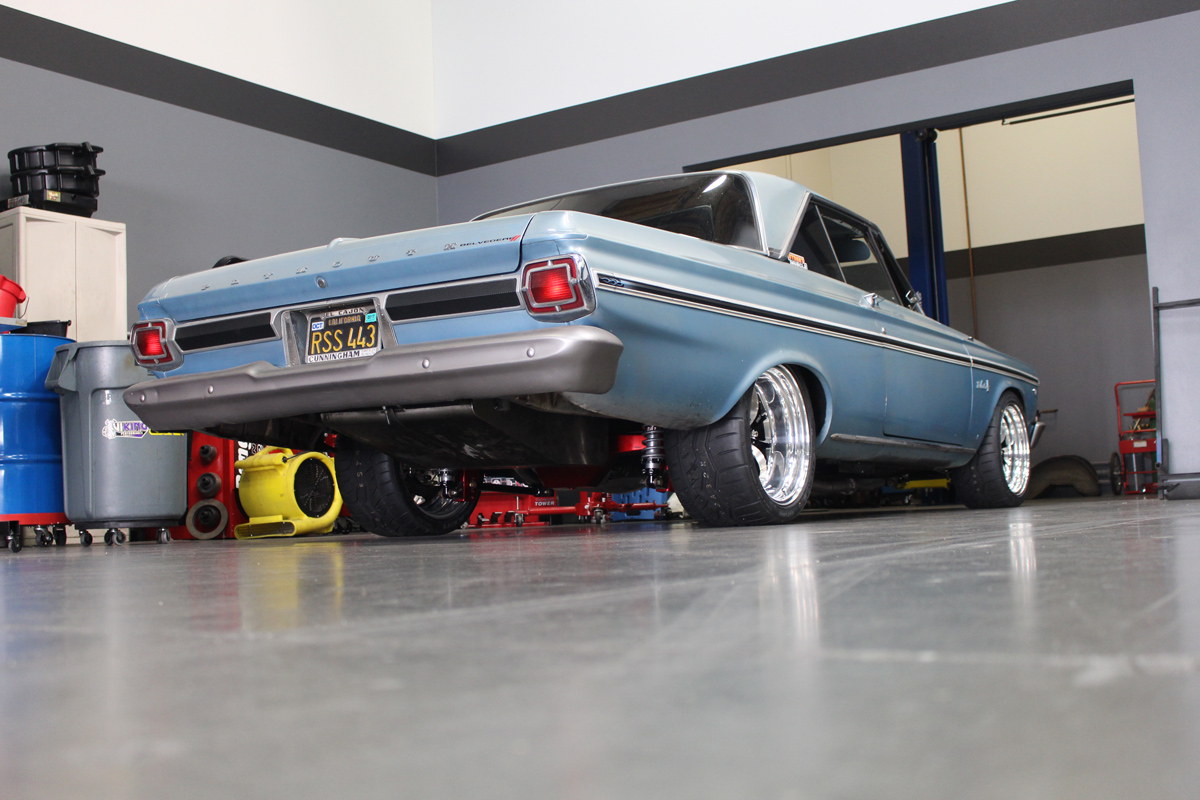
In simple terms, we love it. The car is pushed a little harder on freeway ramps now, and it surprises anyone who thinks it’s just another big car. We still have a little fine tuning to do, and we’ve gone around the car to double-check all of the fasteners, as recommended.
The wide Weld Racing wheels and Falken Azenis RT165K tires have been a big part of the handling improvements, but having a complete coilover suspension has dramatically changed the handling characteristics night and day. And that stance – this isn’t what they intended for this car back in 1965, but even with the latest improvements it surprises people – including us.
Are you ready to transform the handling of your A, B, or E body vintage Mopar? Control Freak Suspensions has just the recipe to turn your old school street machine into track monster that can hang with the best of them. Give ‘em a buzz and find out what they can do for your ride.


