
The Ford 9-inch rear differential is one of the most popular upgrades for hot rodders. Able to handle up to 450 horsepower without upgrades, this widely used rearend can be a vital part of any build. Currie Enterprises is easily one of the foremost resources for rear differentials and their components. Recently, Currie Enterprises published a full “How-To” video on installing a 9-inch into a Tri-Five Chevy.
The video above is not really designed for entertainment. The main goal of this piece is to show just how easy it is to install one of Currie’s differentials. This particular install is on a 1955 Chevy but can be used to correlate between many cars of the same era.
Currie Enterprises took the time to show every aspect of the removal of the original Chevy rear differential as well as show all the new components and the complete install of the new 9-inch
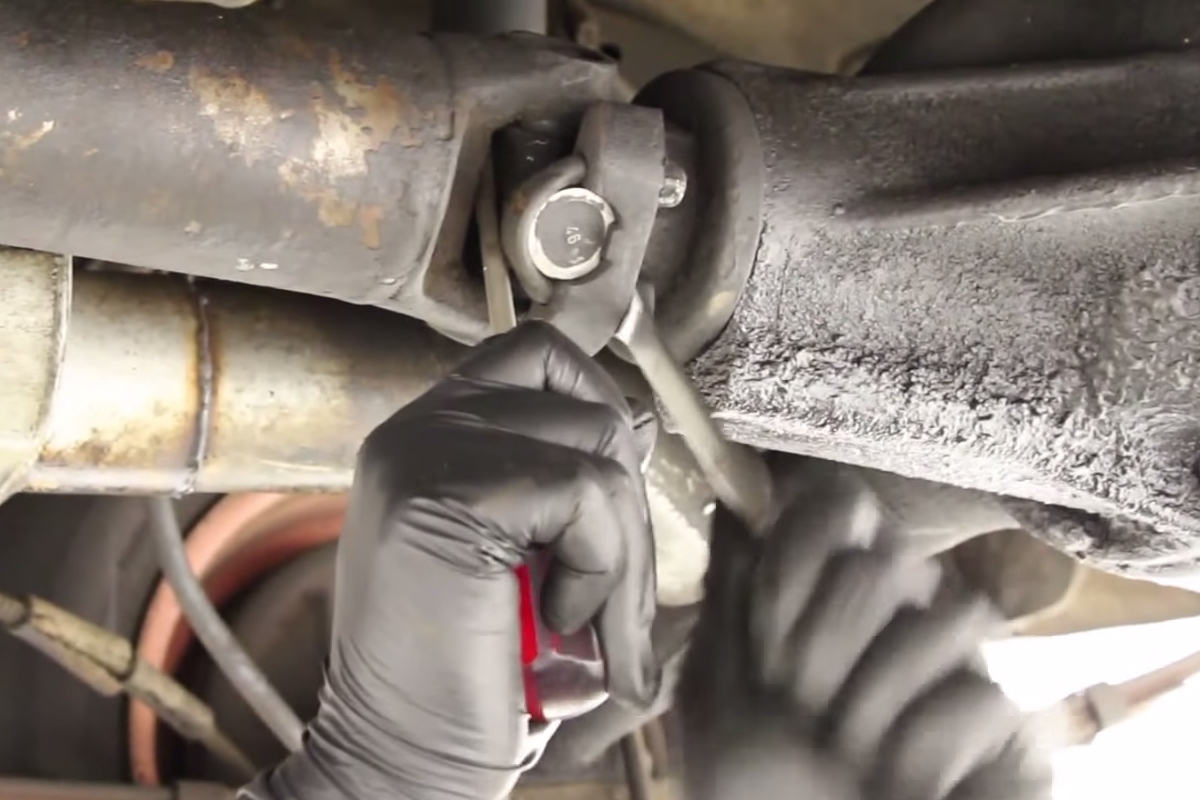
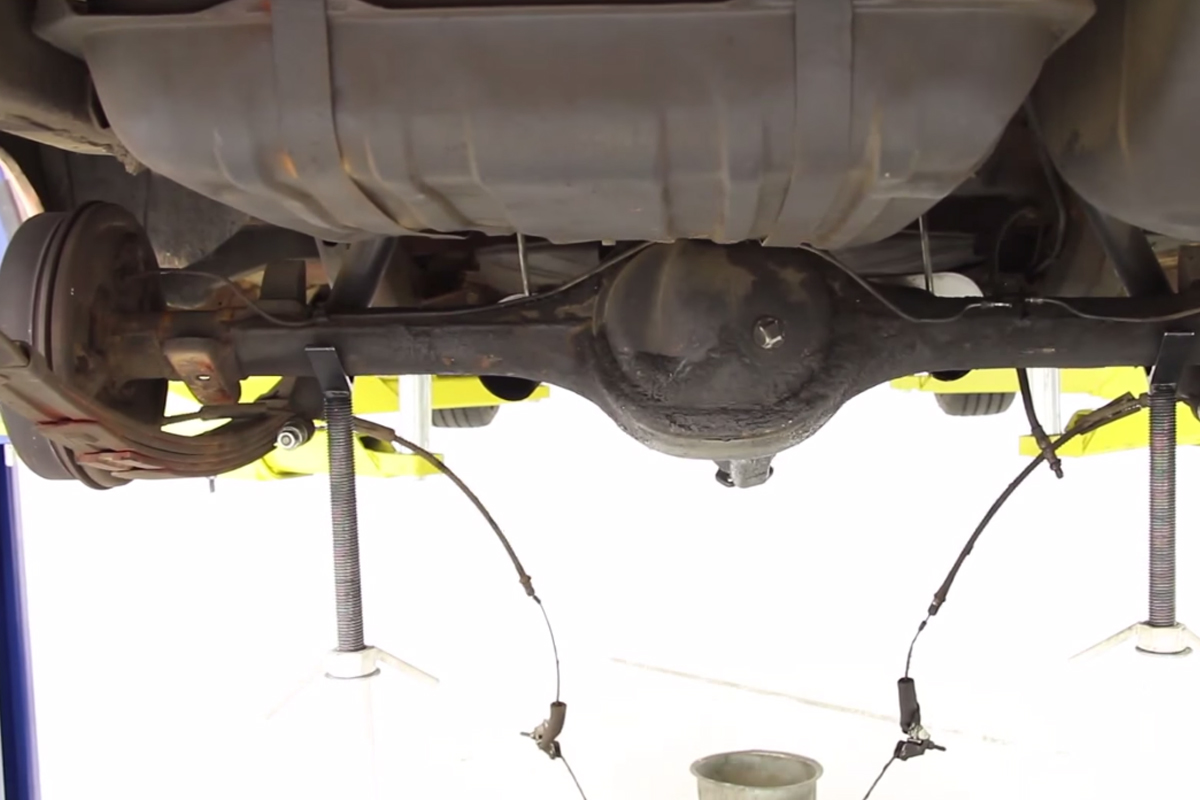
Every aspect of the install is covered. Getting the vehicle in the air is just the start. The Currie guys move on to the complete disassembly of the original rearend, including recommendations on when to do each step through the process. Detailed views of e-brake cable removal and shock removal help to include every aspect of the tear down. Helpful tips are narrated throughout. Tips like, “Be prepared for the rearend to tip forward once all the bolts are removed,” definitely help the novice car builder to know what is expected.
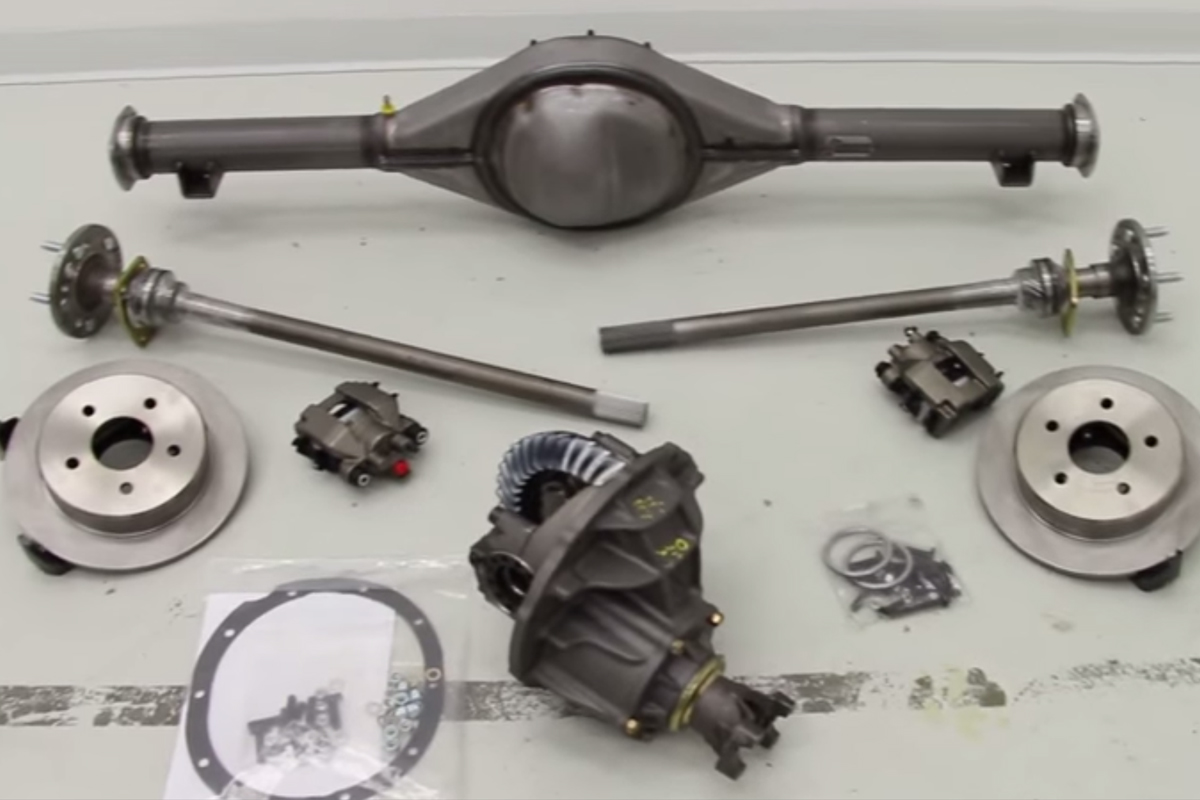
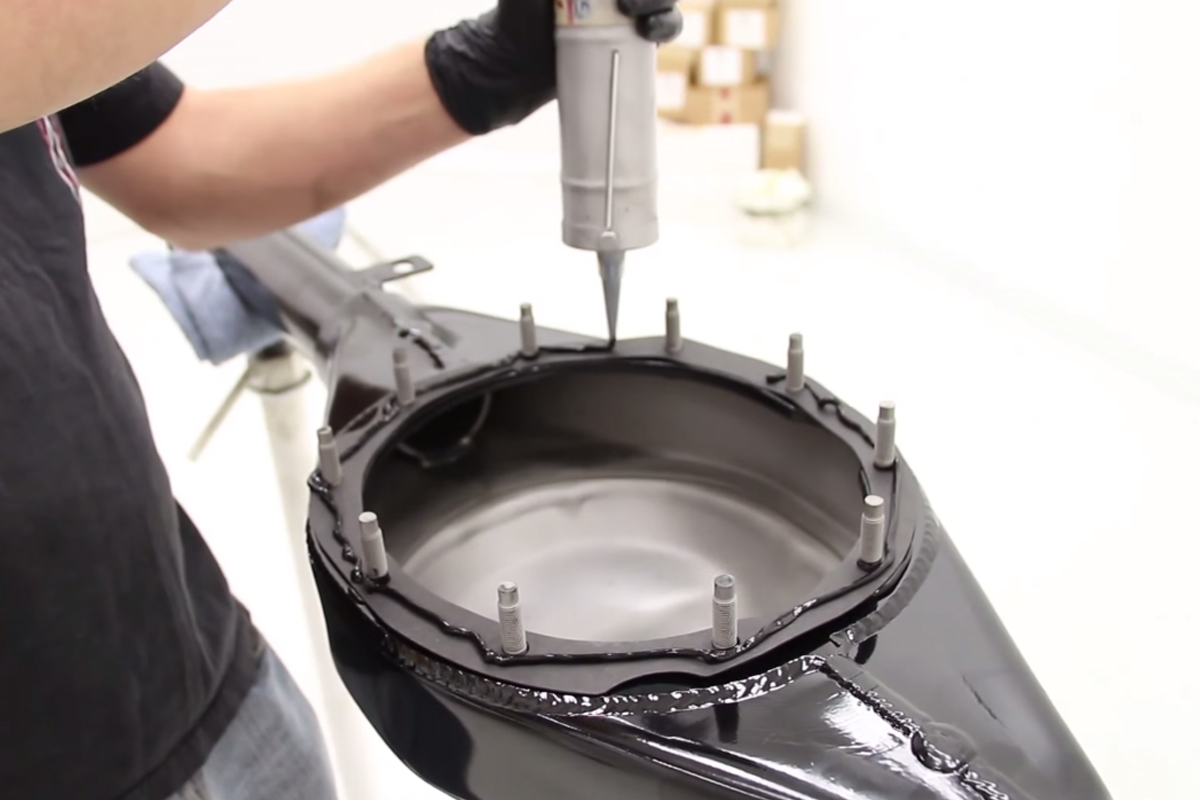
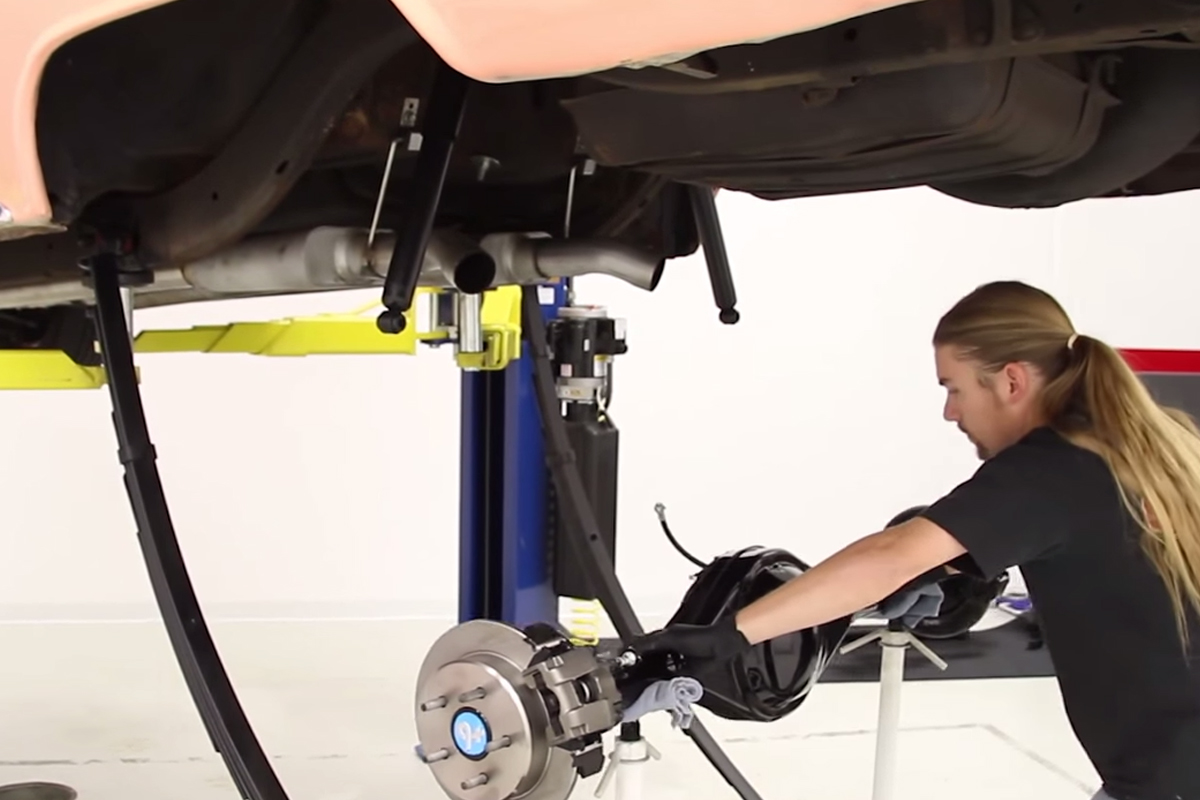 Once the rear diff is out, the Currie team gives a full rundown of the components included with the Crate Rear End Kit as well as discussing optional add-ons. Currie goes on to show proper sealing and installation of the new third member and even shows the full brake and axle install.
The final install is a thing of beauty. Be sure to check out the rest of the videos Currie has on their CurrieTV channel. Currie Enterprises puts the same amount of detail into all their videos, including other installs, introductions to new parts and interviews with Currie team members. Get more info on Currie Enterprises at www.currieenterprises.com.